You can use any of the 3 methods of making a bootable USB, according to your choice. In this case, you need a Kali Linux ISO file from their official website. Don’t worry it’s a free open-source Linux operating system.
So, Let’s begin:-
Method 1: Make Kali Linux Bootable USB Drive (using Etcher)
Step 1: Download the Kali Linux ISO File
Step 2: Plug your USB drive into a USB port of your computer.
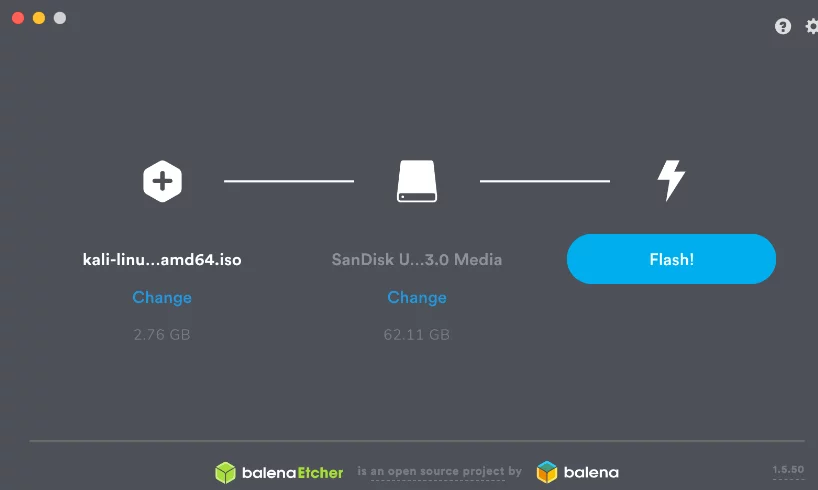
Step 3: Now choose the Kali Linux Image you have downloaded and also verify the USB drive that you have plugged in.
Step 4: Click on the flash button. Once everything is ready and verified.
Step 5: After that Etcher alerts you with a message that the image has been flashed. Then you can safely remove your USB and proceed to boot Kali with it.
Make a Kali Linux Bootable USB Installer (Video Tutorial)
Useful Link: How to install Kali Linux on Laptop or PC (Complete Tutorial)
– Advertisement –
– Continue Reading –
Method 2: Kali Linux Bootable Drive (Using Rufus)
Step 1: Download Kali Linux ISO Image.
Step 2: Now Download Rufus.
Step 3: Copy both of these Files on the Desktop.
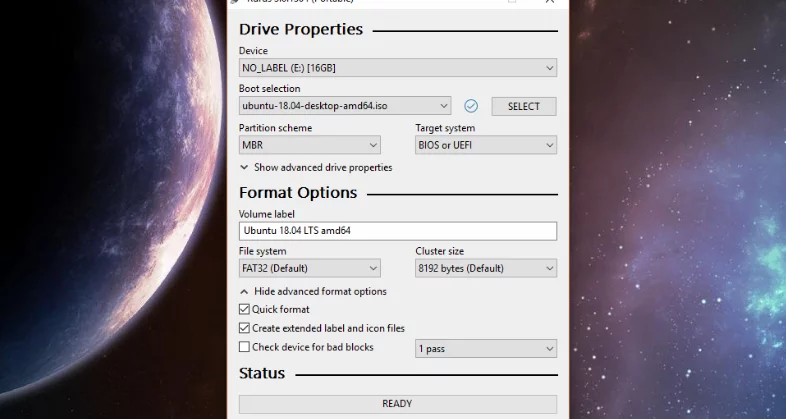
Step 4: Now open Rufus. Insert your USB and Rufus will automatically detect it.
Step 5: Format your USB Drive.
Step 6: Click on Select and Add Kali Linux ISO Image that you have downloaded in Step 1.
Step 7: After some time a pop-up appears to choose DD Method in that.
Step 8: It will take 5-10 min after that. After that Kali Linux Bootable Drive Created Successfully. Close Rufus.
Step 9: Now let’s check our Kali Linux USB. Restart and Boot From Your Kali Linux USB.
Step 10: Choose your Pendrive from Boot Menu.
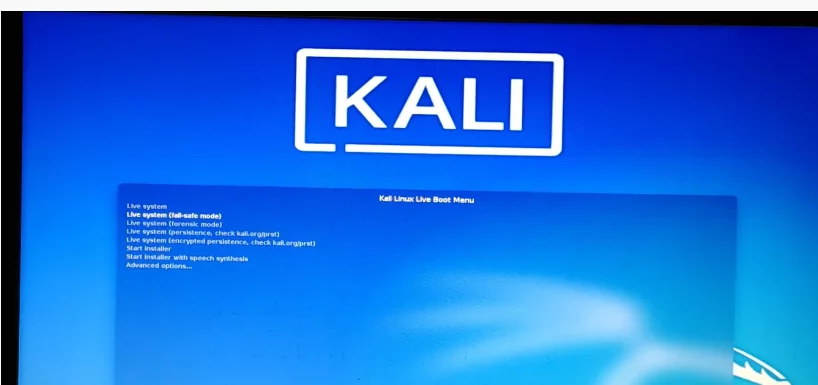
Step 11: After that. Click on the first option. Live system to boot into Kali Live.
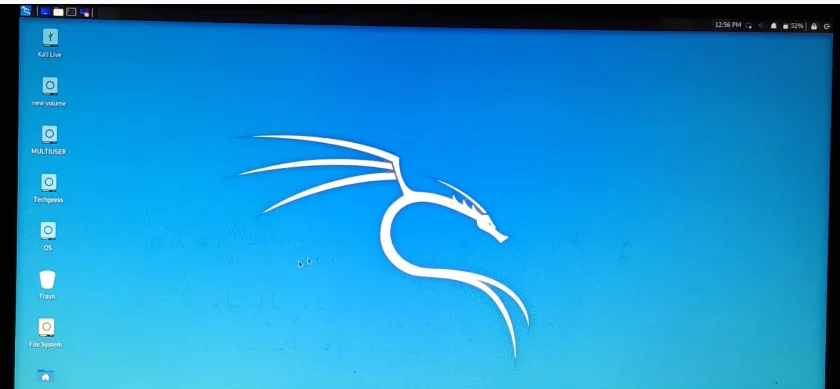
So, We have successfully booted into Kali Linux Live Mode using Rufus.
– Advertisement –
– Continue Reading –
How to create Kali Linux Bootable Using Rufus (Video Tutorial)
Method 3: Kali Linux Bootable USB Drive (Using USB Installer)
Step 1: Download Kali Linux ISO File and Universal USB Installer.
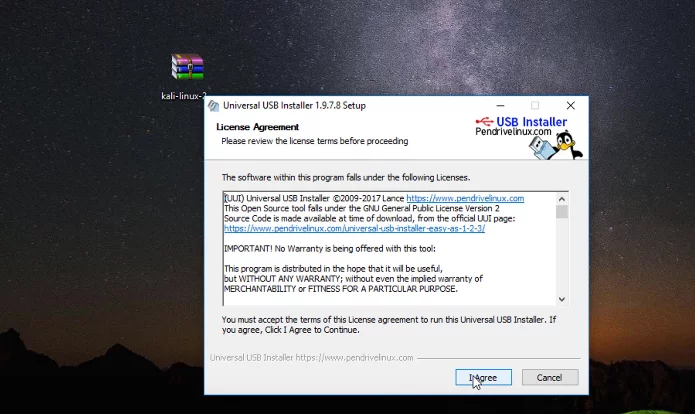
Step 2: Open USB Installer and click on Agree.
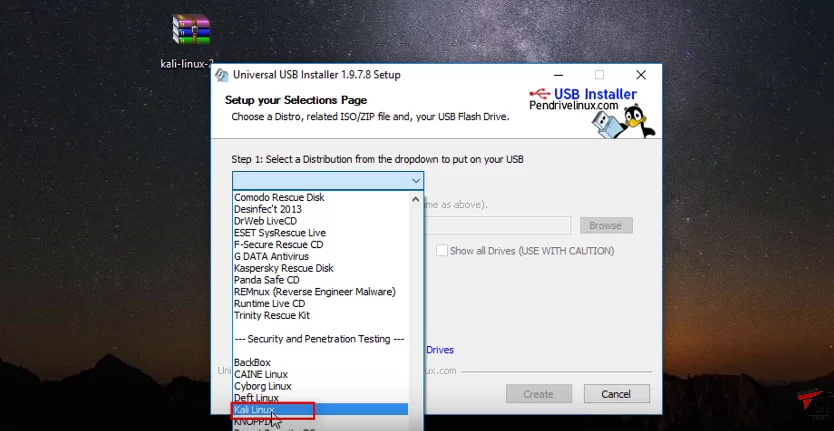
Step 3: Click on Kali Linux from the dropdown.
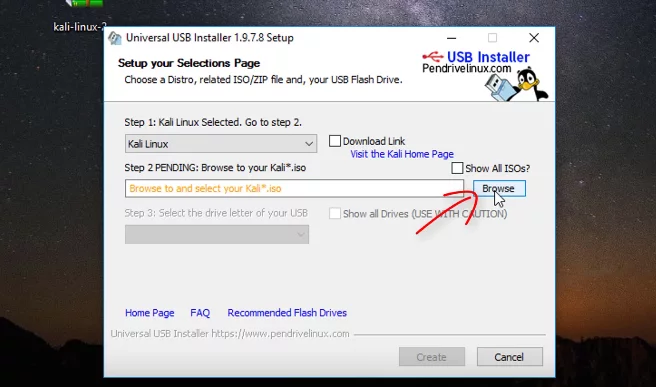
Step 4: Click on Browse to upload the Kali Linux ISO File and upload the File.
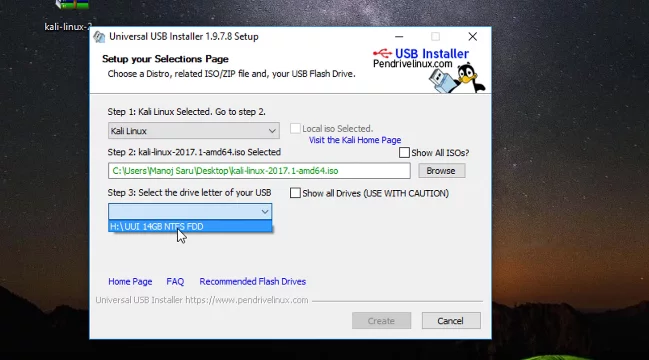
Step 5: Then select the USB Drive which you have plugged into your System.
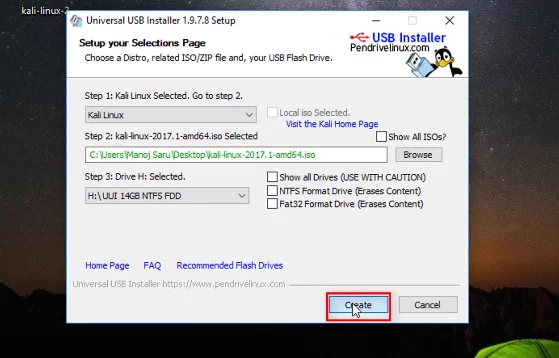
Step 6: After this just click on the create button.
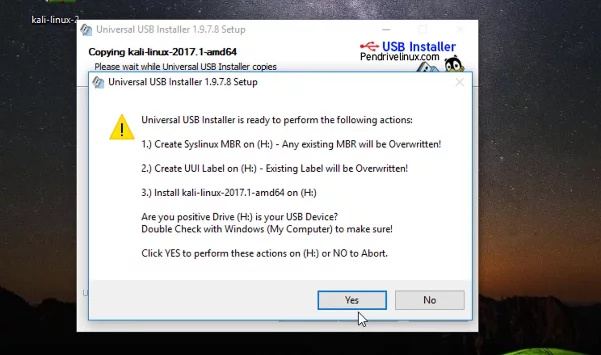
Step 7: Then click on Yes Button.
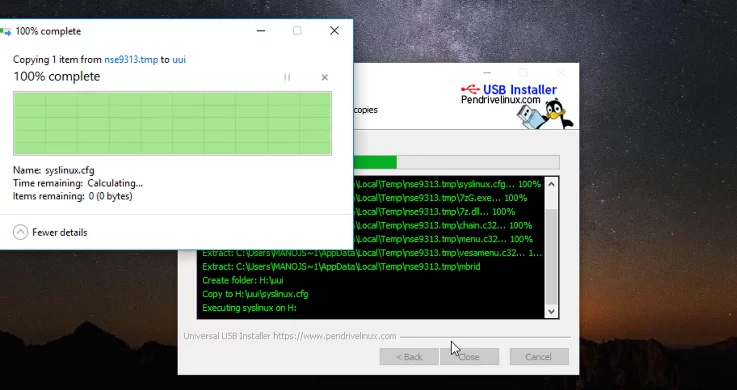
Step 8: Your USB Drive starts getting booted after this. This will take 5-10 mins.
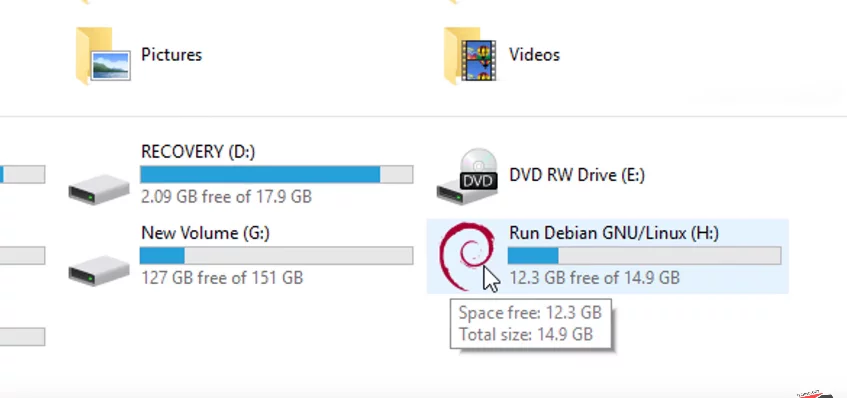
Step 9: After this remove your USB Drive and then if you plug it again, you will see that your USB Drive is booted as it will show the Debian symbol.
– Advertisement –
– Continue Reading –
So, We have successfully created Kali Linux Bootable USB Drive.


